
The Control Area (top right of the editor) provides access to a powerful set of tools for managing, reviewing, and exporting your survey. These tools allow you to control survey structure, run automated checks, manage versions, and prepare outputs for external platforms.
Below is a breakdown of the key features available in this area.

1. Editor Tools #
- AI Assistant
 : Use the AI Assistant to generate, refine, and update survey content, quotas and logic.
 - ResearchReady
 : Run automated checks to analyze your survey for logic, quality, best practices and see the actionalble suggested improvements.
 - Preview Survey
 : View a basic visualization of your survey questions to review structure and flow.
Note: The preview layout can be customized at the company level to match your data collection platform. - Deleted Elements
 : View all deleted elements and restore them if needed.
2. Exports #
Clicking the Export option  allows you to download your survey in different formats.
Note: Some export formats (e.g., SPSS syntax) may require additional supporting files to be uploaded in order to generate the full output.
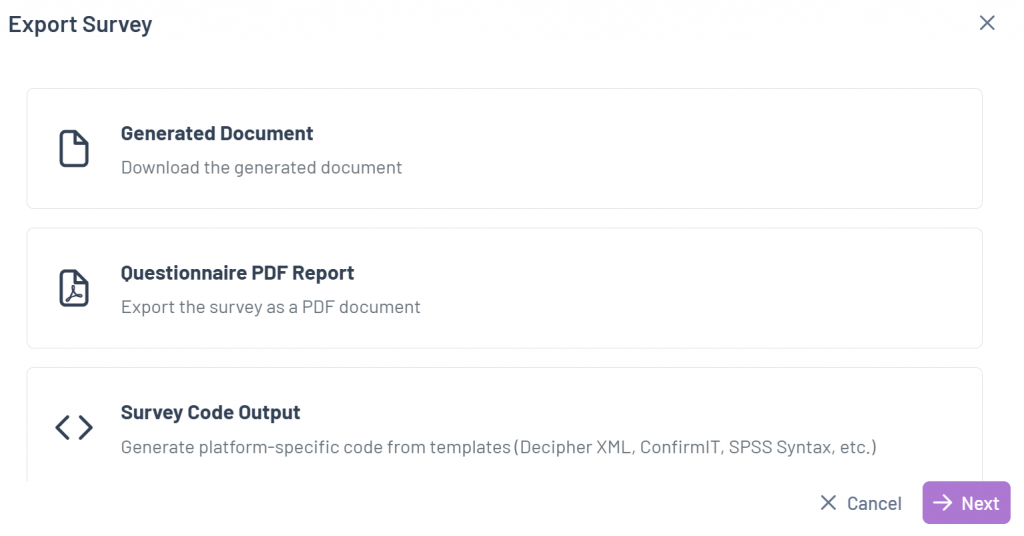
- Source Document: Download the original Word document used to create the survey.
- Questionnaire (PDF): Export the full questionnaire as a readable PDF, including all survey questions and logic, with the option to highlight changes between versions.
- Survey Code Output: Export the survey’s underlying code (e.g., Decipher XML, ConfirmIT, SPSS Syntax, etc) based on the selected output template.
Survey code output options: When exporting the survey’s underlying code, you can select the output format by using one of the available templates.
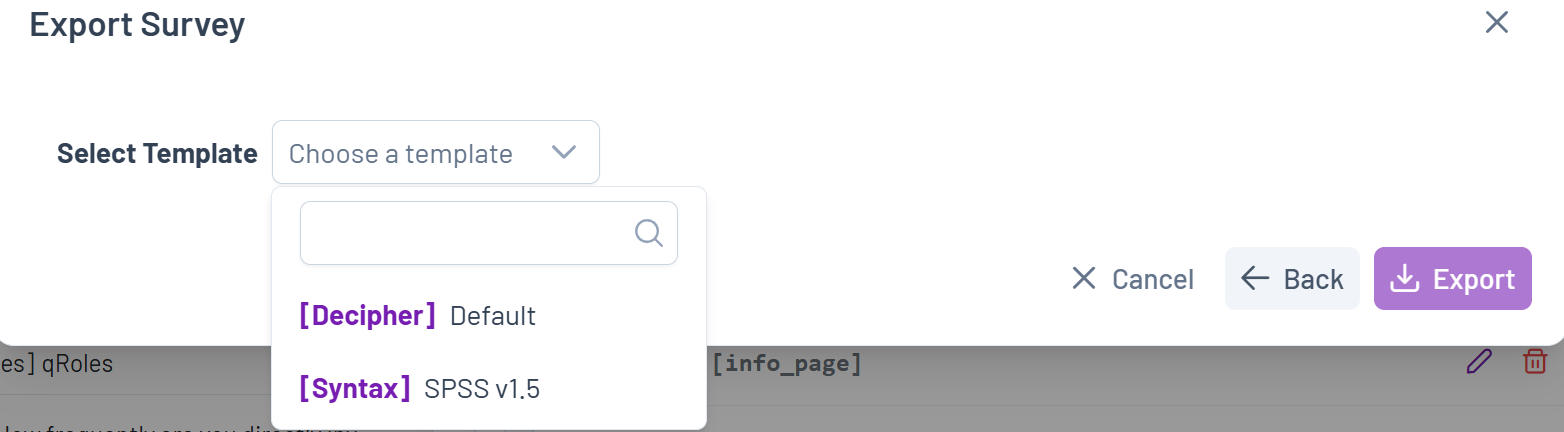
Some templates require you to upload an additional file for the system to generate the correct output, others don’t need any additional files. Each template will indicate what kind of file it requires if any.
Note: There may be additional custom templates available to you in the dropdown menu.
3. Survey Management #
The Survey Management  menu provides tools for managing survey structure, logic, and metadata.
Note: Some tools may not be available depending on your company settings or user permissions.
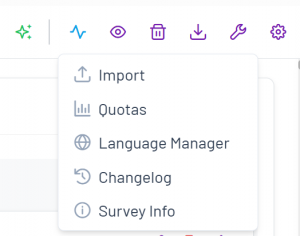
The default tools are as follows:
- Import: Import survey code (e.g., Decipher XML) to update or create survey elements. Imported content will overwrite existing elements to keep the survey in sync.
- Quotas: Use this tool to create, edit, export or import your quotas. Import/export in Excel is supported for better handling.
- Language Manager: Click here to access a dedicated interface for translating your survey into multiple languages. You can add translations directly in the platform or export and import translation files. Language manager supports import and export with collapsed or non-collapsed translations.
- Changelog: This opens a detailed history of your survey, allowing you to see and compare past changes.
- Survey Info: Click here to see the general information for your survey (e.g., number of sections, number of questions, etc.)
4. Settings #
Editor Settings  Allows you to configure how the editor is displayed.
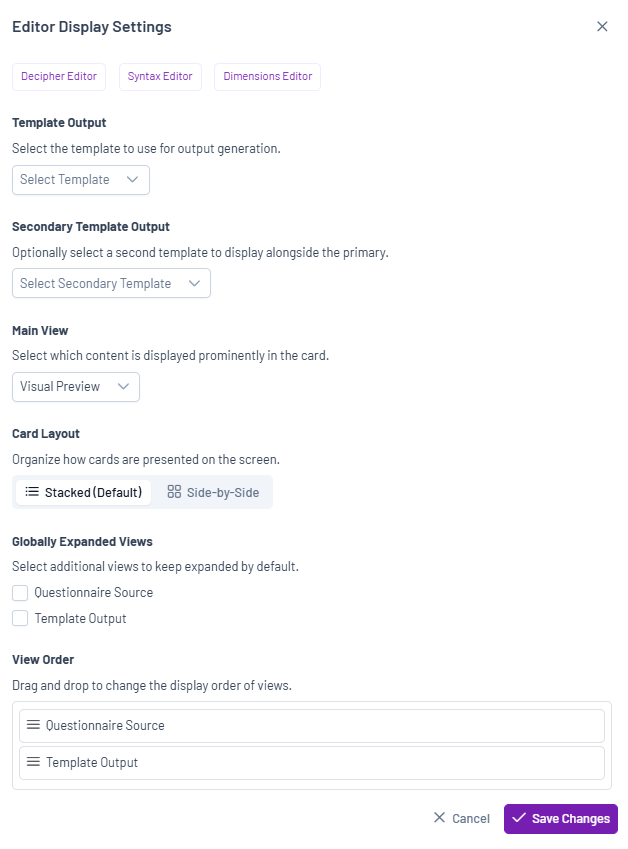
- Switch Display view: Switch between the Classic Editor, Decipher Editor, Syntax Editor and Dimensions Editor.
- Template Output: Select the output template used for code generation.
Note: There are several output templates by default, but you may see additional ones, based on your company.
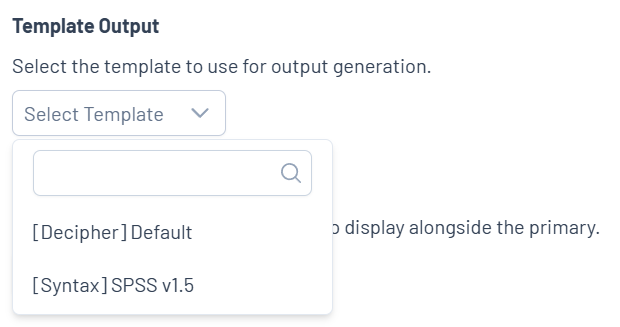
You can see the output when clicking on the expandable “Template output” button next to your questions in the Survey Creator.
The output is different depending on the selection (e.g., for “[Confirmit] Base”, you would see the code in an .xml syntax that is used in the Confirmit platform).
- Secondary Output: Can be shown where the workflow supports comparing or reviewing multiple generated outputs, including when the primary output template produced no output.
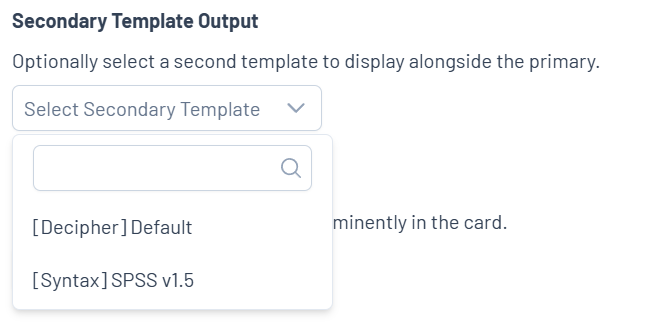
- Main View: Choose which content is displayed prominently in the Classic Editor: Visual Preview, Questionnaire Source or Template Output
Card Layout: Define how cards are presented on the screen – it can be Stacked (default) or Side-by-Side - Globally Expanded Views: Select which views are expanded by default.
View Order: Reorder views by using our drag & drop widget.